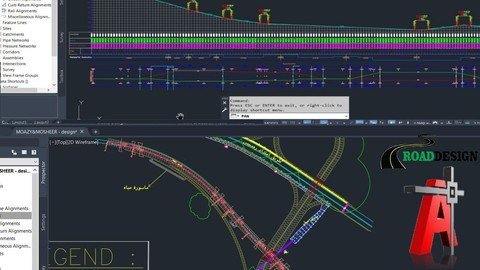
Autocad Civil 3D Complete Course Roads & Highways Design
Published 2/2023
MP4 | Video: h264, 1280x720 | Audio: AAC, 44.1 KHz
Language: English | Size: 6.07 GB | Duration: 10h 7m
What you'll learn
Design a Practical Complete Road and highways with AutoCAD Civil 3D software
AutoCAD Civil 3D certification exams for engineering Students for highways and road design
Prepare Road & highways Design Basis Report with details
Calculate Cut and Fill Surface Volume with Spot Elevation
How To Convert AutoCAD Drawings to KML/KMZ Google Earth
Best Course for Civil Engineering Students List of Project, Thesis and Presentation topics
Rural road development, Advanced Pavement Design, Flexible pavement
Requirements
For This course no specific requirement but some basic AutoCAD, basic computer skills
Have Civil 3D Installed Any Version
Description
Complete Training AutoCAD Civil 3D for Beginners and Intermediate Users - A Complete Guide to AutoCAD Civil 3D and Detailed Road, highways, and Rounabout Design This course was created to show you how I build successful Design a Complete Road and open channel, Roundabout in AutoCAD Civil 3D, in 2023 and beyond I'll take you from the very beginning and show you, over-my-shoulder, how I:Significant Highlights of The CourseThe Civil 3D Interface What is AutoCAD Civil 3D Navigating the User Interface Civil 3D Ribbons Tool Space Prospector Tool Space SettingsProperties Palette Tool Palettes Transparent Commands The Panorama Window.Toggle key and Status Bar Grid mode and snap modeDynamic Input Toggle ButtonObject Snap Toggle ButtonOrthomode Toggle ButtonPolar Tracking mode and Object Snap TrackingRemaining all Toggle Keys Import Points and Basic Setting1. Drawing Settings2. Unit settings3. Points by Manual method4. Draw Points Northing Easting and Elevation5. Import Points as CSV and TXT File6. Points Group Settings7. Points Details8. Points Editing9. Points Label Import points and basic settings Drawing Settings1. Unit settings2. Points by Manual3. Points Northing and Easting4. Import from MS Excel5. Points Group6. Points details7. Points editing8. Points label Alignment creation tools and Settings1. Draw alignment (no curves)2. Draw alignment (with curves)3. Curve settings4. Insert pi5. Delete pi6. Sub-entity editors7. Pick sub-entity8. Points editing9. Alignment grid view Alignment creation1. Draw alignment2. Alignment creation tools3. Alignment properties4. Alignment labels5. Alignment style6. Alignment of stations settings7. Alignment of text settings8. Complete alignment settings1. Edit alignment geometry2. Sub-entity editor3. Layout parameter4. Alignment grid view5. Explain the curve and line6. Create alignment offset7. Create all alignment reports1. Explain offsets2. Create points on alignment3. Measure Alignment4. Show label on points5. Export to excel as a CSV fileCURVE WIDENING AND ALIGNMENT OFFSET1. Create Widening2. Widening Parameters3. Transition Parameters at Entry4. Transition Parameters at Exit5. Create Alignment Offsets with Widening6. Applying Widening Design Criteria As Per AASHTO Standards7. Specify Widening Manually8. Edit offsets parameters9. Add Automatic WideningCreate Surface Profile1. Profile Creation Tools2. Create a Profile from Surface3. Create Profile View4. Draw in Profile View5. Station Ranges6. Draw profile view height (Automatic/User Specified)7. Profile Display Options8. Initial Data Band Adjustment9. Profile View Styles10. Profile Horizontal and Vertical Axes Adjustment11. Profile Graph Scale Setting Create a Design Profile on an existing profile1. Profile Creation Tools2. Create a Profile from Surface3. Create Profile View4. Draw in Profile View5. Initial Data Band Adjustment6. Bands View Elevation Adjustment7. Profile View Styles8. Profile Horizontal and Vertical Axes Adjustment9. Vertical Curve Setting10. Create a Design Profile on an Existing Profile11. Insert New PVI12. Delete PVI13. Delete or Create Entity14. Profile Grid View Add & edit own profile bands1. Edit Profile View Styles2. Work with Profile Graph Scale and Grids3. Profile View Properties4. Delete Existing Profile Band5. Define Cut and Fill Area by Using Hatch Properties6. Create New Profile Bands7. Band for Existing Elevation8. Band for Designed Elevation9. Band for Station10. Band for Cut and Fill Elevation11. Adjust Profile Elevations Ad per Band StylesDisplaying Horizontal and Vertical Geometry in Profile Bands1. Vertical Geometry or Vertical Curve Data2. Horizontal Geometry or Horizontal Curve dаta:3. Create Data Bands4. Edit in Vertical Geometry Band Styles5. Work with Band Details, Display Components, etc.6. Compose labels for Geometry7. Edit in Geometry Layout8. Create New Mathematical Expressions9. Edit Profile Labels10. Work with Dimension Anchor Values11. Displaying Compose Labels in Profile Bands Save and Import Profile Band Styles1. Create and Save Data Bands Style2. Create a Profile Without Bands3. Import the Data Band File4. Import Save Data Bands by Profile View Properties5. Import Profile Data Bands6. Import and Edit Profile Labels7. Adjust Profile Elevation As per Layout Create Assembly in Civil 3D1. Create Assembly Base Line2. Sub-assemblies Properties3. Sub-assembly Parameters4. Add Lane Sub-assemblies5. Add Shoulder Sub-assemblies6. Add Curb Gutter Sub-assemblies7. Add Sidewalk Sub-assemblies8. Add Road Barrier9. Add Daylight Cut/Fill Slope10. Edit Parameters after Composing Create Superelevation in Civil 3D1. Calculate or Edit Superelevation2. Edit Superelevation Curve Manager3. Select Roadway Type, Lanes, Shoulder Control, Attainment4. Edit Superelevation Label5. Draw Critical Points Data of Superelevation6. View Tabular Editor7. Create/Draw Superelevation View8. Specify Color in Superelevation Display Option9. Draw/Show Superelevation Band in #Road #Profile View10. Export Superelevation Data to Excel (CSV format)11. View Superelevation in Road Cross Sections12. Calculate Super Elevation after #Corridor Rebuild13. Superelevation Report Create Road Corridor in Civil 3D1. Create Assembly Base Line2. Sub-assemblies Properties3. Sub-assembly Parameters4. Add Lane, Shoulder, and Daylight Sub-assemblies5. Edit Parameters after Composing6. Create Corridors7. Assigning Base Line and Region Parameters of Corridor8. Assign Frequency9. Target Mapping of Corridor10. Rebuild the Corridor11. Analyze the Drive of the 3D View of the Road12. Super Elevation in CorridorCorridor surface and sample lines on the corridor1. Corridor Properties2. Create Corridor Surface3. Create Corridor Boundaries4. Rebuild Corridor5. Create Sample Lines6. Adjust Data Source for SL Groups7. Adjust Station Range, Swath width, Sampling -- increments & Sampling, Controls8. Draw Sample Lines on CorridorMake Road Cross Section1. Create Multiple Section Views (General, Section Placement, Offset range, Elevation Range, Section Display option, Data Bands)2. Edit Section View Style (Information, Graph, Grid, Title Annotation, Horizontal axes, Vertical Axes, Display, Summary)3. Scale Adjustment and Update Group Layout4. Section View Properties (Information, Offsets, Elevations, - - Sections, Bands, Volume tables, Profile grade lines)5. Section View Group Properties (Ground Surface, Corridor, Finished ground)6. Section Views (Change Band set, Add Bands, Change Volume7. Table, Profile grade points, offset, and elevations)8. Edit Code Set Style (Point Codes, Link Codes, Shape Codes)9. Draw/Show Missing Code Set Styles in Cross Sections10. Scale Adjustment for Section View and Road Profile1. Create Multiple Section Views (General, Section Placement, Offset range, Elevation Range, Section Display option, Data Bands)2. Edit Section View Style3. Section View Properties4. Section View Group Properties5. Adjust the Section Option6. Adjust Section View Group Bands (FG Elevation & EG Elevation)7. Set Quantity Takeoff Criteria8. Compute Materials9. Generate Volume Report10. Change and Insert Volume Tables with Sections11. Insert Volume & Material Tables in the Drawing12. Export Data Table to XML File & Excel File Drawing Template for Plan Profile sheet creations1. Create New Drawing Template2. Page Setup Manager3. Plotter Configuration Editor4. Create Custom Paper Size (A0 or A3)5. Adjust Plot Style Table6. Create New Template with a Required Scale7. Insert North Arrow and Scale Bar8. Adjust Template on New Paper Size with Scale9. Create New Frames and Sheets with Designed Template Design Roundabout Civil 3D1. Create Road Alignments2. Create a Roundabout3. Roundabout – Circulatory Road4. Roundabout – Approach Roads5. Roundabout – Islands6. Regenerating Roundabout Model7. Edit Roundabout Parameters8. Add/Edit Road Approach Data9. Add Turn Slip Lanes with a Roundabout10. Add Road Signs and Markings11. Edit with Turn Slip LanesCalculate Cut and Fill Surface Volume in Civil 3D 1. Import Surface Points2. Create a Surface (Base and Comparison Surface)3. Create Tin Volume Surface4. Edit Surface Style (Display Settings)5. Surface Properties6. Apply Elevation Analysis on Current Surfaces7. Create Elevation Banding on Surfaces (Base and Comparison Surface)8. Create Cut Fill Banding on Volume Surface9. Analyze Surface Volume10. Work with Volume Dashboard11. Insert Cut/Fill Summary12. Generate Cut/Fill Report13. Add Surfaces Legend Table for Elevation & Cut/Fill Banding14. Label Spot Elevation on the Grid at the Surface (Cut/Fill Elevations) Complete Design Basis Report for Client1. Complete the Report2. Design Standard3. Superelevation details4. Spiral details5. Project details6. Complete table information details7. Location map and project map8. Detailed design complete detailsPre-requisitesYou must access AutoCAD Civil 3D software (student, trial, or commercial version) for this course. This course can be used with AutoCAD as well.I wish you happy learning I hope the teaching will be memorable God Bless you.Best Regards: Murad Farooq
Overview
Section 1: Getting Familiar With AutoCAD Civil 3D
Lecture 1 AutoCAD Civil 3D Interface
Lecture 2 Introduction Application Button
Lecture 3 Prospector Tab
Lecture 4 AutoCAD Civil 3D Basic Settings Details
Lecture 5 Panorama Window
Lecture 6 What are transparent commands in Civil 3D?
Lecture 7 Inquiry Command in AutoCAD Civil 3D
Lecture 8 Part-2 Layer relationship
Lecture 9 Drawings and Zone Unit settings AutoCAD Civil 3D
Lecture 10 AutoCAD Civil 3D UI Settings
Section 2: Introduction to Status Bar and Toggle Keys
Lecture 11 Status bar and toggle key
Lecture 12 Dynamic Input Toggle Button
Lecture 13 Object Snap Toggle Button
Lecture 14 Orthomode Toggle Button
Lecture 15 Polar Tracking mode and Object Snap Tacking
Lecture 16 Remaining all Toggle Keys
Lecture 17 Practice Session
Section 3: Introduction to Parcels
Lecture 18 Parcel Introduction
Lecture 19 Parcel Properties and Labels
Lecture 20 Parcels sub divide and Slide Line
Lecture 21 Edit Slide Line
Lecture 22 Swing Line Create and Swing Line Edit
Lecture 23 Free Form Create and Other options
Lecture 24 Parcel Union and Dissolve
Lecture 25 Parcel Table and Table Properties and Style
Lecture 26 Parcel Data Report and Table Export
Section 4: Introduction to Points
Lecture 27 Points Introduction
Lecture 28 Create Points Manual
Lecture 29 Create Points on Polyline
Lecture 30 Points Editing
Lecture 31 Import Points Group Part-1
Lecture 32 Import Points Group Part-2
Lecture 33 Points Group Properties & Settings
Section 5: Introduction To Surface
Lecture 34 Surface Introduction
Lecture 35 Create Surface from CSV file
Lecture 36 Delete Extra lines from Surface
Lecture 37 Change Contours interval and Contours Smoothing
Lecture 38 Surface Style
Lecture 39 Create Surface From other Objects ,Polyline, AutoCAD Points, DEM, 3D Points
Lecture 40 Add Labels to Surface
Lecture 41 Grid on Surface
Lecture 42 Surface Analysis
Lecture 43 Surface Analysis Table & Data
Lecture 44 Export and Import Surface
Section 6: Introduction to Alignment
Lecture 45 Alignment Introduction
Lecture 46 Alignment Creation Tools
Lecture 47 Draw Alignment with details
Lecture 48 Alignment Geometry Editor
Lecture 49 How to Change Curve Radius
Lecture 50 Create offset Alignment
Lecture 51 Create Alignment from Object
Lecture 52 Create Points on Alignment and on offset Alignment
Lecture 53 Alignment Labels and Reports
Section 7: Introduction to Profile
Lecture 54 Create Surface Profile
Lecture 55 Draw Design Profile
Lecture 56 Edit Profile Labels
Lecture 57 Draw Existing ground offset edges Profile on Profile view
Lecture 58 Create Superimposed Profile
Lecture 59 How to add and Edit own Profile Band Part-1
Lecture 60 How to add and Edit own Profile Band Part-2
Lecture 61 Add Horizontal and Vertical Geometry Band
Lecture 62 Save and Import Profile Bands
Section 8: Introduction to Assembly
Lecture 63 How to Create Assembly
Section 9: Introduction to Superelevation S.E
Lecture 64 What is Superelevation
Lecture 65 Draw Superelevation View and Band
Lecture 66 Export Superelevation Data
Section 10: Introduction To Corridor and Sample line
Lecture 67 What is Corridor and how to Create Corridor
Lecture 68 Corridor Surface
Lecture 69 Sample Lines
Section 11: Introduction To Multipole Cross Section
Lecture 70 Make Road Cross Sections
Lecture 71 Edit Cross Section View Style
Lecture 72 Cross Sections View Properties
Lecture 73 Add Band to Multiple cross sections
Lecture 74 Cross Sections Code set Edit and Add
Lecture 75 Calculate Cut and Fill Volume for Road Earthwork Qty with Vol Table
Lecture 76 Volume Quantity Report
Section 12: Introduction to Plan Production and Profile Sheets Creations
Lecture 77 Plan Production and Profile Frames Creations
Lecture 78 Plan Production and Profile Sheet Creations
Section 13: Design Road Roundabout
Lecture 79 How to Design Road Roundabout in AutoCAD Civil 3D
Section 14: Bounce Lecture AutoCAD Civil 3D
Lecture 80 Introduction to Creating Feature Lines
Lecture 81 How to Draw q Quick Cross Section
Lecture 82 How to Create Surface table
Lecture 83 How to Calculate Cut and Fill Volume
Section 15: Introduction to Highways Design Report
Lecture 84 Highways Design Basis Report
Anyone wishing to learn AutoCAD Civil 3D or Highways Design,Engineering Students,Survey Engineering students,Civil Engineering Students
Homepage
https://www.udemy.com/course/autocad-civil-3d-complete-course-roads-highways-design/
zbcgn.Autocad.Civil.3D.Complete.Course.Roads..Highways.Design.part1.rar.html
zbcgn.Autocad.Civil.3D.Complete.Course.Roads..Highways.Design.part2.rar.html
zbcgn.Autocad.Civil.3D.Complete.Course.Roads..Highways.Design.part3.rar.html
zbcgn.Autocad.Civil.3D.Complete.Course.Roads..Highways.Design.part4.rar.html
zbcgn.Autocad.Civil.3D.Complete.Course.Roads..Highways.Design.part5.rar.html
zbcgn.Autocad.Civil.3D.Complete.Course.Roads..Highways.Design.part6.rar.html
zbcgn.Autocad.Civil.3D.Complete.Course.Roads..Highways.Design.part7.rar.html

zbcgn.Autocad.Civil.3D.Complete.Course.Roads..Highways.Design.part1.rar
zbcgn.Autocad.Civil.3D.Complete.Course.Roads..Highways.Design.part2.rar
zbcgn.Autocad.Civil.3D.Complete.Course.Roads..Highways.Design.part3.rar
zbcgn.Autocad.Civil.3D.Complete.Course.Roads..Highways.Design.part4.rar
zbcgn.Autocad.Civil.3D.Complete.Course.Roads..Highways.Design.part5.rar
zbcgn.Autocad.Civil.3D.Complete.Course.Roads..Highways.Design.part6.rar
zbcgn.Autocad.Civil.3D.Complete.Course.Roads..Highways.Design.part7.rar
Links are Interchangeable - No Password - Single Extraction